CONE BOTTOM CONTAINERS Filter containers with cone shaped bottoms have a definite advantage over flat bottomed containers, especially when it comes time to drain away accumulated sludge. It is difficult, (if not impossible) to drain all the sediments from a flat bottomed container without emptying the media and using a hose to wash out the container.
Many of us would prefer to enjoy the advantages of cone shaped filter container bottoms. The problem is, such containers are expensive and also can be difficult to install, since they require special support frameworks.
It is possible, though, to retrofit flat bottomed containers with cone shaped bottoms at minimal cost and effort.
The first step is the installation of a bottom drain in the center of the container. There are two ways to accomplish this.
One way is to cut a hole in the middle of the bottom of the container and install a bulkhead fitting for the drain. This provides the least loss of container volume, but requires a support that allows for the exterior drain pipe.
Another approach, is to install the bulkhead fitting on the side of the container as close to the bottom as possible. Then run a section of PVC to a 90 degree fitting positioned in the center of the container. But care must be taken to allow enough room on the bottom for the bulkhead gasket.
The best results are had with a cone bottom container when the angle of the cone from horizontal is at least 45 degrees. Less than that and sediment may "hang up" on the cone sides.
The cone must be constructed from a material that is stiff but flexible enough to be formed to the proper shape. It also needs to be as slick as possible. So far, the best and cheapest material I have found what is called "coil" by companies that install aluminum siding. It is an aluminum product that is easy to cut and form into a cone. Of course some home improvement stores sell 3 foot square sheeets of aluminum that also work nicely.
Designing the cone:
Way back when I had all my mental faculties (Well, most of them anyway) I was into the hobby of designing and building scale model LDRS rockets. (LDRS stands for "Large and Dangerous Rocket Systems"). This hobby appealed to me especially since I worked on the internal guidance systems of the first USA weapon that was designed to deliver a nuclear warhead when I was in the US Army. Anyway, I needed an easy caclulator for designing a rocket body section where there were reductions in body diameter; hence a cone with a cut off top. I finally was able to put together some math formulas from my old geometry book to come up with the following method.
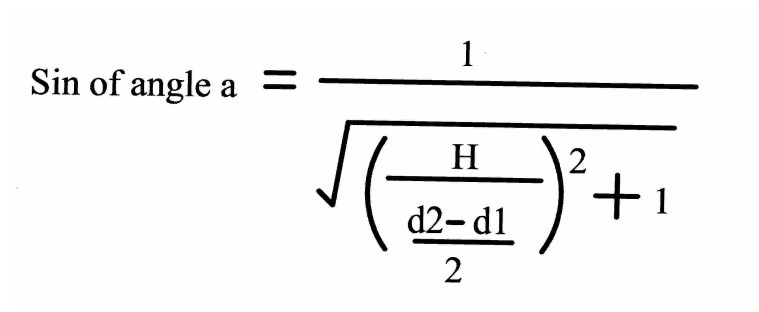
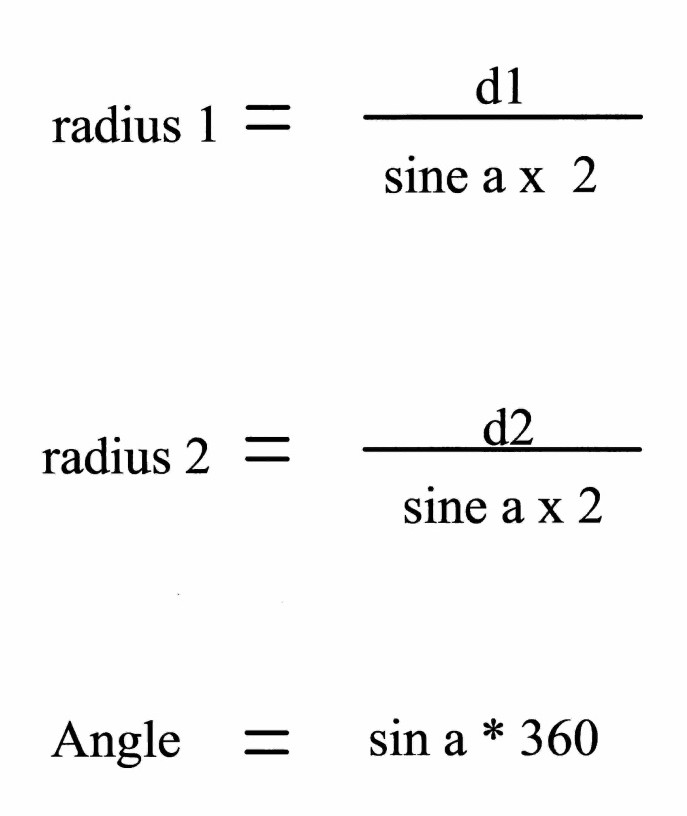
The givens for an inverted cone are the desired diameter of the bottm (small) opening(d1), the diameter of the top opening (d2) and the height of the cone (H) as measured vertically. The pattern parameters would be the radius (r1) needed to mark a flat sheet for the bottom opening, the radius (r2) needed to draw the top opening, and the angle (a) needed to complete the pattern.
This first formula returns the sine of the angle needed for the cone pattern. All you have to do to calculate the angle is to multiply the sine by 360.
These two formulas return the radius needed for both the top and bottom openings for the pattern.
First, you need to determine the diameter of your bottom cone opening (d1). In the example below, I have indicated a 2" diameter opening in the center of the container.
Next, decide on the height of the cone (H). Measure up from the bottom of the container. Remember to choose a height that will result in at least a 45 degree angle from the horizontal.
Measure exactly the diameter of your container at the desired cone height.
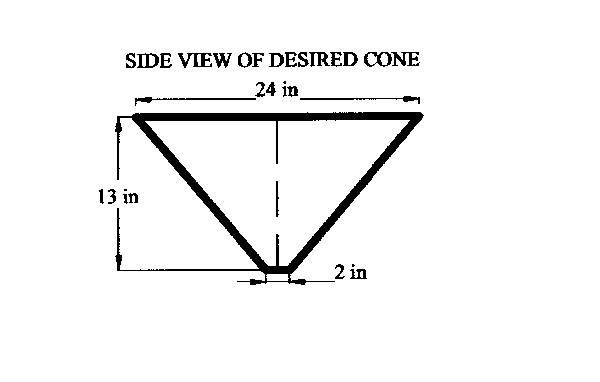
Now you have all you need to design your cone: the diameter of the lower opening ,d1 (2 inches in the example), the diameter of the large cone opening, d2, (24 inches in the example), and the height of the cone, H (in this case 13 inches).
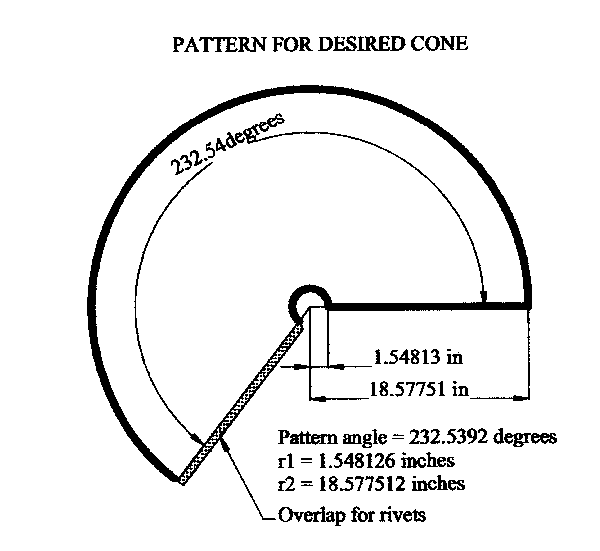
Entering the diameters of 2 inches and 24 inches and a cone height of 13 inches, the formulas return an r1 or small radius of 1.548 inches, an r2 (large) radius of 18.578 inches and an angle of 232.54 degrees. Drawing these three parameters on a flat sheet produces the following pattern:
When cutting out, be sure to add an overlap of from 1/2 to 2 inches (depending on the cone size) to accomodate the rivets that will hold the cone together. Tape the cone in its proper shape temporarily and drill appropriate sized holes through the overlap area, and fasten the edges with pop rivets in the drilled holes.
Since the calculations can become tricky, here is a calculator that will return the radii and angle for your cone:
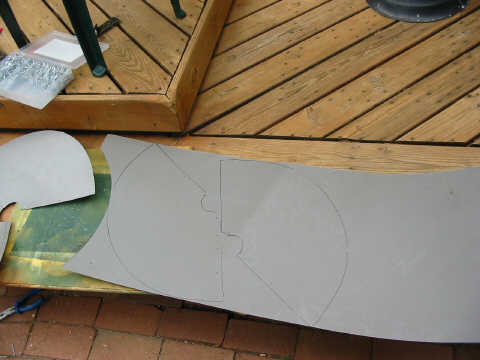
Now we look at exactly how to convert all this information into a cone bottom container. Here is a cone pattern made out of aluminum siding "coil". Notice that the cone had to be made in two sections because the material was not wide enough to draw out the entire pattern on one piece.
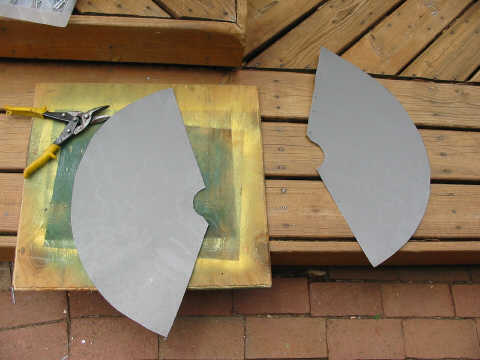
Here are the two parts cut out:
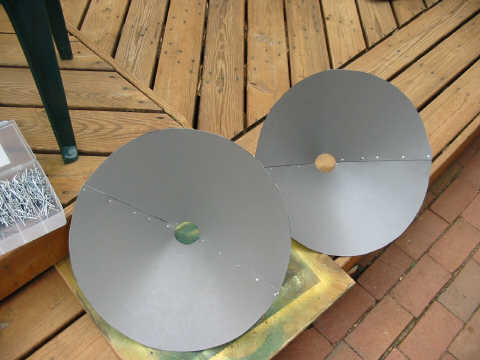
And here is what they look like riveted together (As you can see, I was making two cone bottom containers at the time):
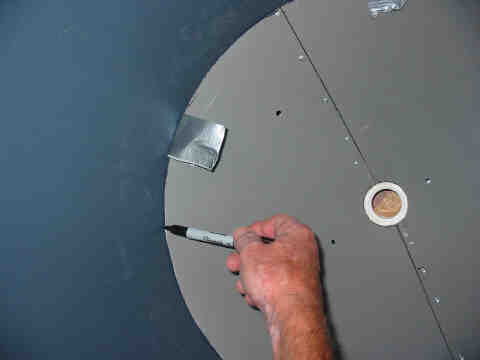
Temporary duct tape handles facilitate putting the cone in and out of the container for measuring purposes
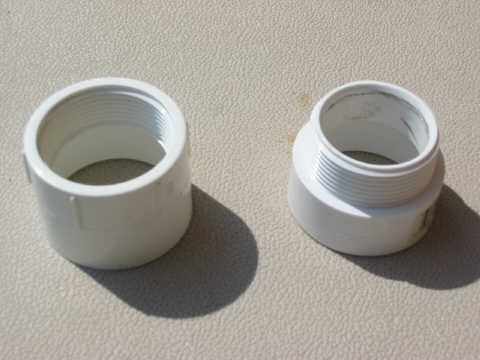
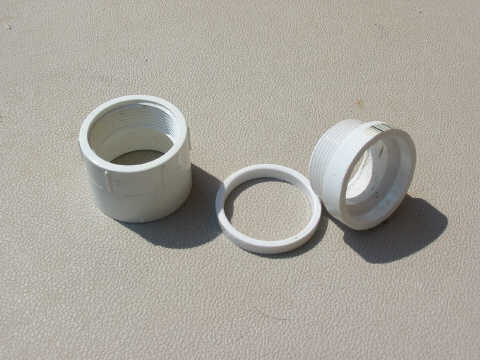
The bottom drain can be fashioned from 2 inch PVC fittings like these: Be sure to use the type that has a flat surface where the threads meet the slip-on part.
Using a miter saw cut a ring from the male fitting like the one shown. This is done more safely if a short length of 2 inch PVC pipe is inserted into the fitting and the other fitting stuck on the other end to keep the fitting you are cutting square without endangering your hands or fingers:
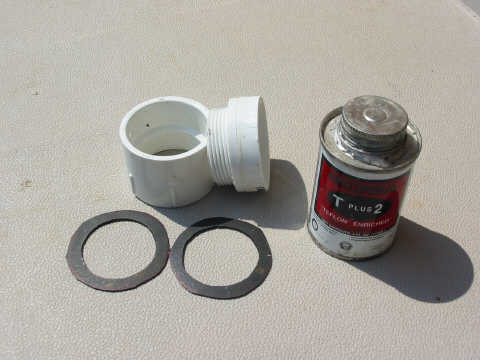
The cut off ring is placed over the male threads and cemented in place with pvc cement. This is because the pvc fittings will not tighten close enough together to compress the gaskets enough to seal the connection unless you shorten the male threads. You cannot simply cut off some of the threads as they are tapered. Look closely at the picture to see the ring cemented in place. Also pictured are two gaskets cut from left over EDPM liner. The Teflon pipe dope is to be sparingly applied to the threads, not on the gaskets.
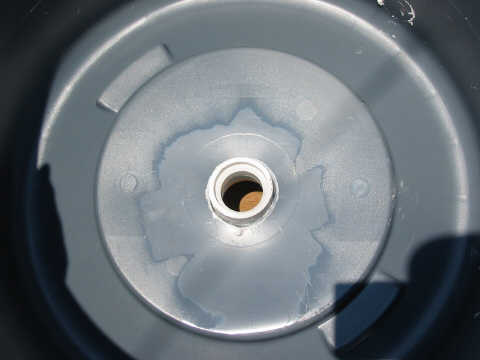
Use a 2 ¼ inch hole saw to cut the hole in the center of the container. Insert the male fitting from the inside of the container, using rubber gaskets on both the inside and outside.
Tighten securely, but not enough to distort the gaskets. Seal with polyseam seal both on the inside and outside.
<
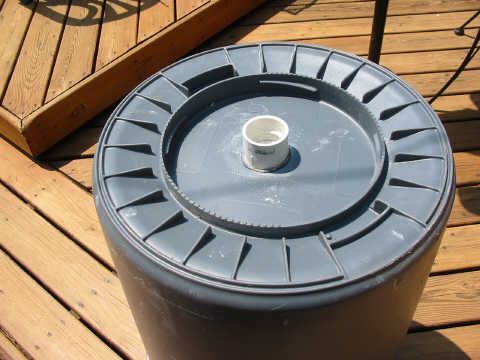
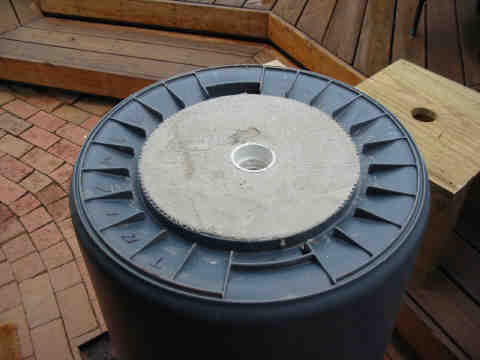
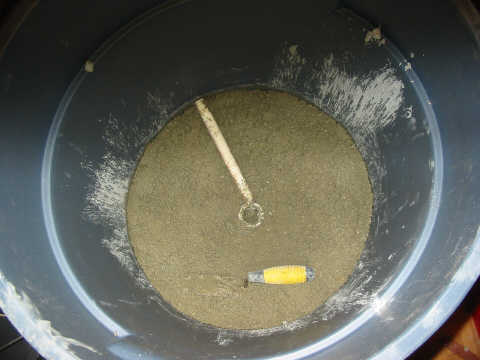
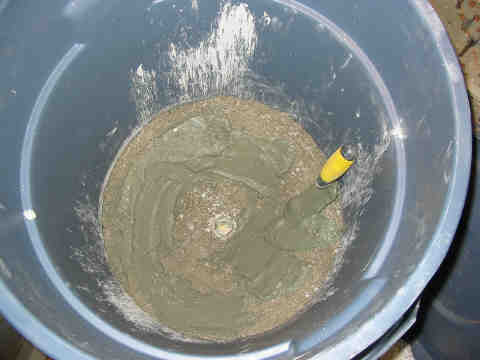
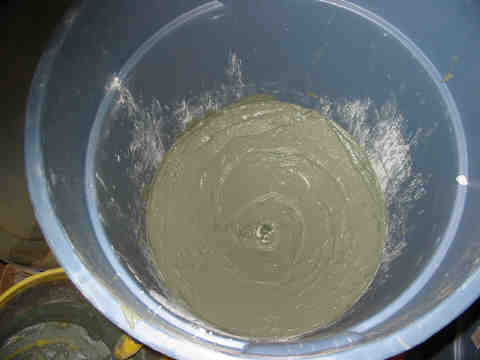
If using a 55 gallon drum the next step is not necessary. If using a Rubbermaid container such as the one shown, it is necessary to reinforce the bottom center or it will eventually sag. Mix up enough mortar mix to fill the center depression, trowel it smooth, and then tap the container until the cement is smooth with no bubbles. Let cure three days before moving container.
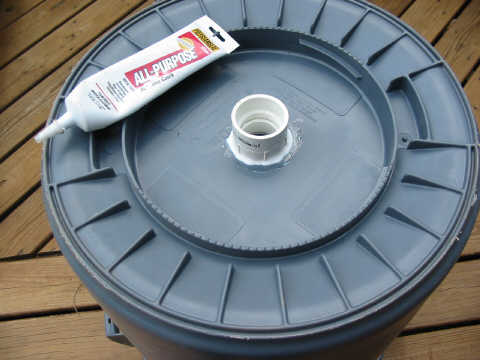
Then seal with a good cement waterproof sealer.
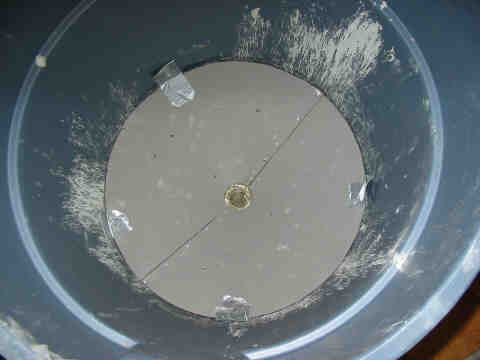
Next place your cone inside the container and position it as level as possible. Then using a marking pen, trace around the top of the cone. This will provide a guide for the cone base.
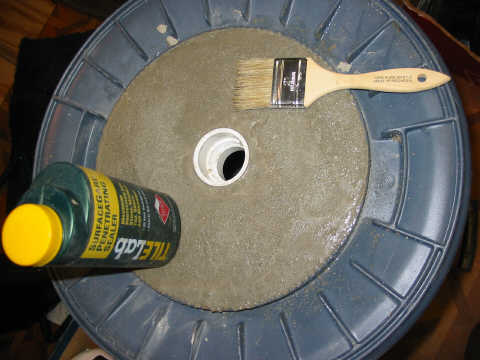
Mix Portland cement with perlite in a 1 to 3 ratio by volume with just enough water to allow the mixture to be worked. You can use mortar mix instead but this will result in a heavier mix. Use a ruler or piece of ¾ inch pvc to form the cement mix into a base for the cone, filling up just to the line marked earlier. A good base is important to prevent sediment and water from beneath the cone.
Allow the cement to cure at least three days without moving the container. You can then trowel on a thin coating of “thinset” mortar to provide a smoother surface for the cone to rest on.
The cone base should look something like this:
Before the thinset mortar sets, immediately install the cone, pressing down all around until the thinset mortar squirts out all around the edges. Wipe away the excess and allow the container to sit undisturbed for three more days.
Remove the duct tape tabs and seal all edges with polyseamseal:
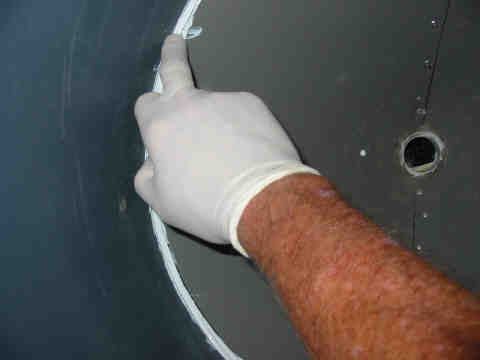
Using your fingers (inside rubber gloves) create a smooth transition between the cone and the side of the container.
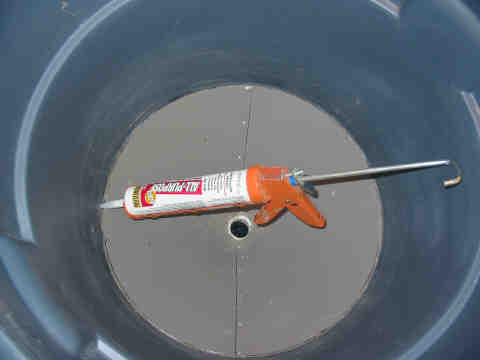
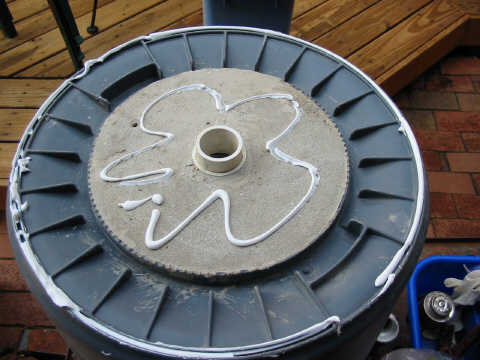
Carefully invert the container and apply polyseamseal to the bottom.
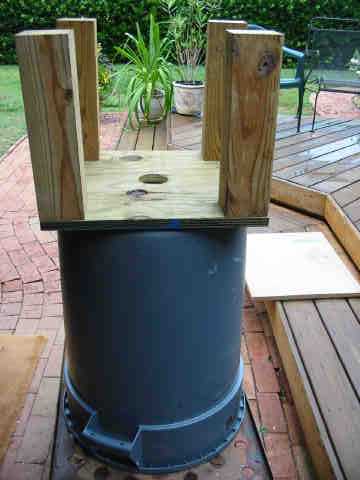
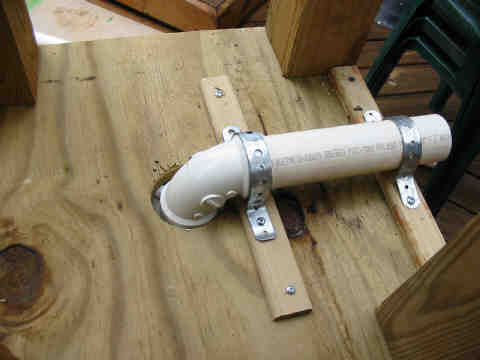
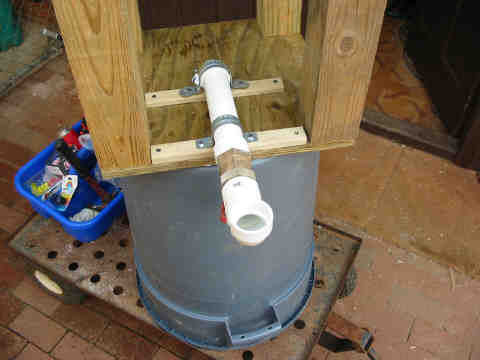
Position your container stand (Made from treated ¾ inch plywood and treated 4 x 4’s with a hole in the middle to accept the protruding 2 inch pvc fitting in the container bottom).
Cement a short section of pvc pipe and elbow and a section of 2 inch pvc long enough to protrude past the base. Fasten the pvc pipe to the base as shown. Be sure to use screws short enough that they don’t protrude through and puncture the container.
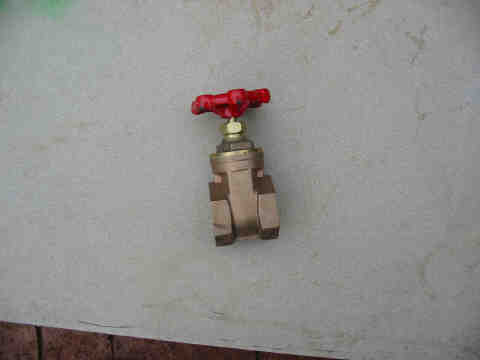
You will need two slip/male 2 inch PVC fittings and a 2 inch brass gate valve like this one: (Do not try to use pvc type ball gate valves as they are hard to operate and the “wings” are bad about breaking off)
Add one more 2 inch elbow:
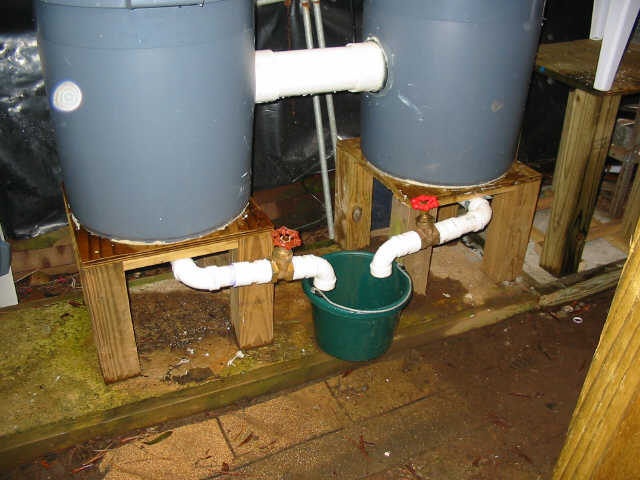
Here is how the completed project will appear. Once a week open each gate valve all the way and then close, allowing about a gallon of water out. The water will be full of sediment that is good for fertilizing roses, etc, as long as you don’t salt your pool.
Last modified on December 17,2004

![]()